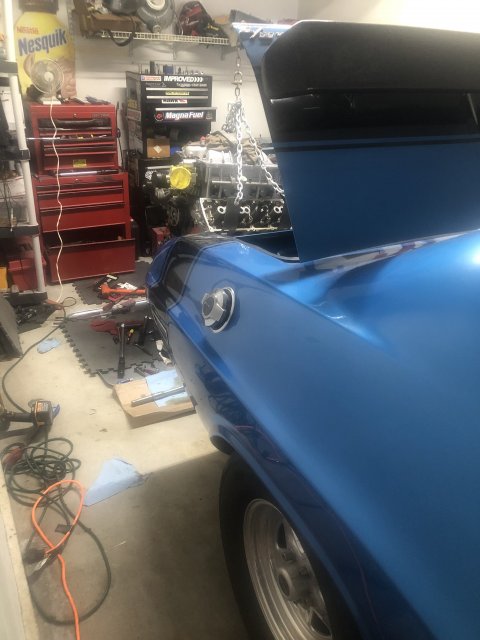
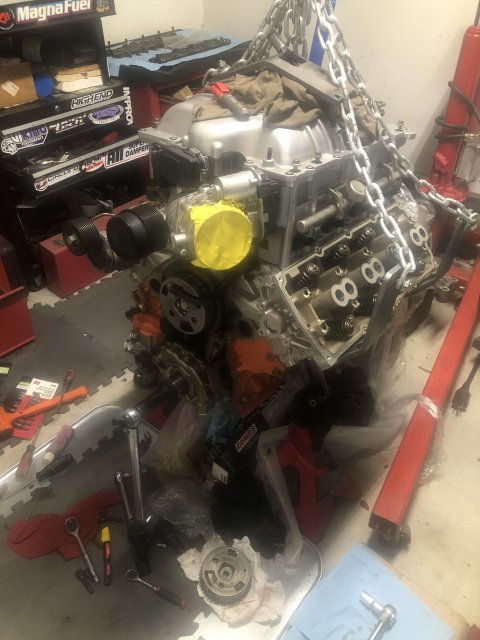
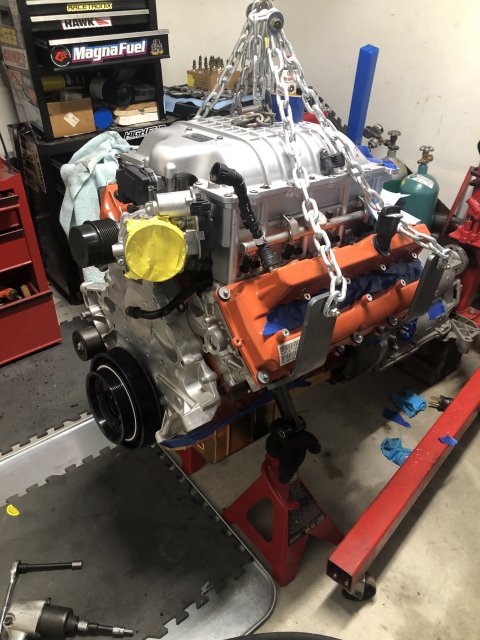
• Sign Up! To view all forums and unlock additional cool features

    Welcome to the #1 Dodge, Jeep and RAM Forum dedicated to FCA owners and enthusiasts. Register for an account, it's free and it's easy, so don't hesitate to join the SRT Forum today!


Half Cat build?

1mean376

Law Enforcement
Member ID
#13680
Messages
8
Reactions
44
Likes
12
City
Holtsville
State
NY
Country
United States
Vehicle
1970 Challenger RT
#1
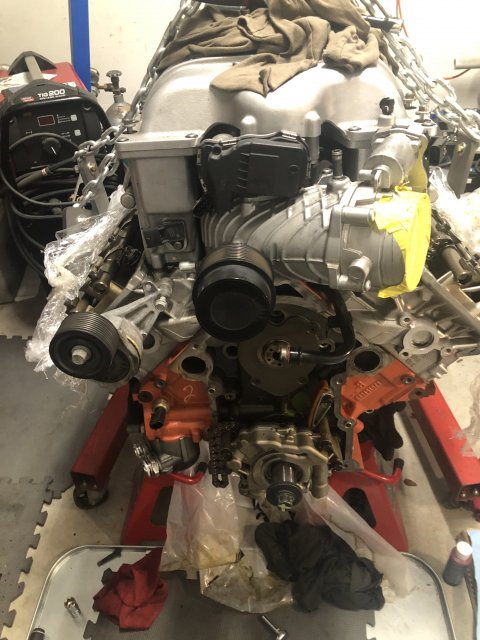
Not sure if this is allowed here, but I'm dropping a 15k mile 2018 6.2 Hellcat and 8hp90 into my 70 challenger and figured it might be cool to share. Obviously a lot of the swap stuff doesn't really concern most here who have actual hellcats, but figured I'd share some of the things that might be helpful (motor specific stuff).

I just finished up swapping an MMX NSR HC1+ cam and doing an ATI lower pulley. Going to share a few tips because I found there was A LOT of bad info out there with these mopars. I come from the LSX world and it's much easier to find accurate information, but these cars seem to have a host of people making youtube videos who act like they know what they're doing but push some false info.


I'll start with the cam swap.

1) you have to lift the blower up by removing all the long blower bolts and propping the front of the blower up with something like a wood block so you can access the coolant passage tube bolt that mates the coolant pipe with the timing cover. I tried for a while to get to it without lifting the blower and it was impossible. Don't waste your time, takes 2 minutes to remove the long blower bolts and lift the front of the blower up giving you clear access.

2) Comp's instructions for the cam phaser limiter lockout incorrectly state you need a Torx T25 bit for the cam phaser bolts. Perhaps certain years used T25, but I have seen a few cam phasers now and all of them require a TORX PLUS E25 bit. YOU WILL STRIP THE BOLTS OUT DURING YOUR FINAL TORQUE IF YOU USE A T25 AND NOT A TORX PLUS BIT. I can't reiterate this enough. IF you strip out the bolt that holds the clock spring (the "do not remove" bolt in the instructions) you are pretty much screwed unless you figure out a way to extract that bolt without unwinding the clock spring (good luck). *** all OEM phasers I have seen use the E25 (Torx Plus) but I have seen one Melling brand phaser that used E27 (also Torx Plus).

3) If you were like me and checked cam endplay with the thrust plate bolted on, don't freak out. The cam will move way too much, it's supposed to. The cam phaser/timing sprocket will pull the cam forward when bolted on and sandwich the cam between the thrust plate and THAT's when you will check cam end play, after the phaser is installed.

4) Kind of simple but an oil filter wrench (the two handle plier type) works great to safely compress the timing chain tensioner without risking damage to the chain or tensioner. The notches in the jaws fit perfectly over the chain.

5) TIMING MARKS. This is a huge one as I saw one video on youtube claiming to be able to time the motor by the oil pump splines and from what I could tell, that made zero sense and would not work (thanks to a buddy of mine who builds Mopars for a living for confirming that as I thought I was going crazy watching the video).

Best way to time the motor is to set cylinder 1 at TDC (I like to use a bore scope down that spark plug hole). This means when cyl 1 is furthest up in the bore on the COMPRESSION stroke (you should be able to feel pressure building if you stick your finger in the spark plug hole while the piston is climbing to the top and both pushrods should spin freely once the piston is at TDC indicating both valves are closed).

From there, find the timing indicator in the cam phaser/gear (it's a little rectangle on the cam gear/sprocket itself, kind of have to look behind the phaser) which should be at 12 o clock. Now you have confirmed you're at TDC. From there, I made a few parks with a paint marker.

Top of phaser at 12 o clock, gear tooth on phaser at 12 o clock, a link on either side of the gear tooth, a link on the timing chain and crank gear tooth at 6 o clock, a link and a line on both the tensioner and guide so I can match those up as well for peace of mind.

Remove the cam phaser and the cam pin should be at 12 o clock. Install the new cam and line it all up the same way with your marks.

6) Rocker Shaft Assembly. I found these are NOT torque to yield bolts, they CAN be re-used despite even a dealership tech telling me otherwise. They have a torque angle measurement in the sequence but this is to account for lifter bleed down and nothing to do with bolt stretch.


ATI Balancer install:

Can't really help much with the correct tool, I just put two balancer remover/installer tools together and was able to make a hybrid to remove the factory balancer.

for install, you're probably better off using a long stud (M16x1.5 I believe, most tools don't have it) to install, but if you have some experience with this you can do what I did and just hammer on the hub with a wood block until you are in deep enough to use the old bolt to walk it in. I like to use anti seize behind the washer for added lubrication. Just be very careful using this method because if you hammer it on crooked you could end up damaging the balancer or crank. I have usually found this is pretty difficult to mess up though since of the tight fit. You need to make sure you can hammer it on enough to get more than a few threads to engage on the bolt, and if it feels like it's taking a ton of tension to tighten, stop and go find a stud before you strip threads out.

You are really supposed to mic and hone these things, but i've never had one yet on a factory crank that couldn't be pulled on fairly easily providing you use a coating of anti seize on the crank and in the hub bore. Don't try to install one dry, you are asking for trouble. I didn't need to boil it or heat it in an oven or anything. There were a few gentle pops going on which indicates it probably could have used a thou or two honed out of it but nothing that made me worried it would damage anything going on or give me an issue in the future coming off, and i'd rather have it on the tighter side for obvious reasons.

Everything else is just following instructions, like grinding the timing cover bolt and AC mounting boss for the ATI pulley. Just go easy, take your time and take a little at a time off with frequent test fits. You can always take a way, but you can't add more back (without a TIG welder anyway).


I'm no expert on these Gen3 Hemis by any means so take this all with a grain of salt but hoping these tips could help someone else doing the same or similar mods.
IMG_9303.jpg


Attachments

BULL

Oh NO! Not that guy!
Staff Team
Founding Member
U.S. Marine Veteran
Donating Member
HFCOTM
Wiki Contributor
Member ID
#1079
Messages
15,253
Reactions
47,453
Likes
402
City
Weld County
State
CO
Country
United States
Vehicle
MY16 M6 Challenger Hellcat
HFCOTM
View Images
#2
Welcome to our house!


And your build is also very welcome too!


Pictures of completed car of course too!


DavidKFla

Poster Club Hall of Fame
Premium Account
U.S. Air Force Veteran
10 Second Best E/T
HFCOTM
Member ID
#6741
Messages
30,871
Reactions
135,742
Likes
402
City
East Coast
State
FL
Country
United States
Vehicle
2018 Charger Hellcat
#3
We need pictures since most of us can't read.


Hunter

9000 Posts Club
Staff Team
Founding Member
Premium Account
U.S. Army Veteran
Donating Member
HFCOTM
Member ID
#957
Messages
9,430
Reactions
25,459
Likes
402
City
Moss Point
State
MS
Country
United States
Vehicle
2019 Challenger Hellcat
HFCOTM
View Images
#4
Welcome to our house!


And your build is also very welcome too!


Pictures of completed car of course too!
Wiki maybe?


Hunter

9000 Posts Club
Staff Team
Founding Member
Premium Account
U.S. Army Veteran
Donating Member
HFCOTM
Member ID
#957
Messages
9,430
Reactions
25,459
Likes
402
City
Moss Point
State
MS
Country
United States
Vehicle
2019 Challenger Hellcat
HFCOTM
View Images
#5
Not sure if this is allowed here, but I'm dropping a 15k mile 2018 6.2 Hellcat and 8hp90 into my 70 challenger and figured it might be cool to share. Obviously a lot of the swap stuff doesn't really concern most here who have actual hellcats, but figured I'd share some of the things that might be helpful (motor specific stuff).

I just finished up swapping an MMX NSR HC1+ cam and doing an ATI lower pulley. Going to share a few tips because I found there was A LOT of bad info out there with these mopars. I come from the LSX world and it's much easier to find accurate information, but these cars seem to have a host of people making youtube videos who act like they know what they're doing but push some false info.


I'll start with the cam swap.

1) you have to lift the blower up by removing all the long blower bolts and propping the front of the blower up with something like a wood block so you can access the coolant passage tube bolt that mates the coolant pipe with the timing cover. I tried for a while to get to it without lifting the blower and it was impossible. Don't waste your time, takes 2 minutes to remove the long blower bolts and lift the front of the blower up giving you clear access.

2) Comp's instructions for the cam phaser limiter lockout incorrectly state you need a Torx T25 bit for the cam phaser bolts. Perhaps certain years used T25, but I have seen a few cam phasers now and all of them require a TORX PLUS E25 bit. YOU WILL STRIP THE BOLTS OUT DURING YOUR FINAL TORQUE IF YOU USE A T25 AND NOT A TORX PLUS BIT. I can't reiterate this enough. IF you strip out the bolt that holds the clock spring (the "do not remove" bolt in the instructions) you are pretty much screwed unless you figure out a way to extract that bolt without unwinding the clock spring (good luck). *** all OEM phasers I have seen use the E25 (Torx Plus) but I have seen one Melling brand phaser that used E27 (also Torx Plus).

3) If you were like me and checked cam endplay with the thrust plate bolted on, don't freak out. The cam will move way too much, it's supposed to. The cam phaser/timing sprocket will pull the cam forward when bolted on and sandwich the cam between the thrust plate and THAT's when you will check cam end play, after the phaser is installed.

4) Kind of simple but an oil filter wrench (the two handle plier type) works great to safely compress the timing chain tensioner without risking damage to the chain or tensioner. The notches in the jaws fit perfectly over the chain.

5) TIMING MARKS. This is a huge one as I saw one video on youtube claiming to be able to time the motor by the oil pump splines and from what I could tell, that made zero sense and would not work (thanks to a buddy of mine who builds Mopars for a living for confirming that as I thought I was going crazy watching the video).

Best way to time the motor is to set cylinder 1 at TDC (I like to use a bore scope down that spark plug hole). This means when cyl 1 is furthest up in the bore on the COMPRESSION stroke (you should be able to feel pressure building if you stick your finger in the spark plug hole while the piston is climbing to the top and both pushrods should spin freely once the piston is at TDC indicating both valves are closed).

From there, find the timing indicator in the cam phaser/gear (it's a little rectangle on the cam gear/sprocket itself, kind of have to look behind the phaser) which should be at 12 o clock. Now you have confirmed you're at TDC. From there, I made a few parks with a paint marker.

Top of phaser at 12 o clock, gear tooth on phaser at 12 o clock, a link on either side of the gear tooth, a link on the timing chain and crank gear tooth at 6 o clock, a link and a line on both the tensioner and guide so I can match those up as well for peace of mind.

Remove the cam phaser and the cam pin should be at 12 o clock. Install the new cam and line it all up the same way with your marks.

6) Rocker Shaft Assembly. I found these are NOT torque to yield bolts, they CAN be re-used despite even a dealership tech telling me otherwise. They have a torque angle measurement in the sequence but this is to account for lifter bleed down and nothing to do with bolt stretch.


ATI Balancer install:

Can't really help much with the correct tool, I just put two balancer remover/installer tools together and was able to make a hybrid to remove the factory balancer.

for install, you're probably better off using a long stud (M16x1.5 I believe, most tools don't have it) to install, but if you have some experience with this you can do what I did and just hammer on the hub with a wood block until you are in deep enough to use the old bolt to walk it in. I like to use anti seize behind the washer for added lubrication. Just be very careful using this method because if you hammer it on crooked you could end up damaging the balancer or crank. I have usually found this is pretty difficult to mess up though since of the tight fit. You need to make sure you can hammer it on enough to get more than a few threads to engage on the bolt, and if it feels like it's taking a ton of tension to tighten, stop and go find a stud before you strip threads out.

You are really supposed to mic and hone these things, but i've never had one yet on a factory crank that couldn't be pulled on fairly easily providing you use a coating of anti seize on the crank and in the hub bore. Don't try to install one dry, you are asking for trouble. I didn't need to boil it or heat it in an oven or anything. There were a few gentle pops going on which indicates it probably could have used a thou or two honed out of it but nothing that made me worried it would damage anything going on or give me an issue in the future coming off, and i'd rather have it on the tighter side for obvious reasons.

Everything else is just following instructions, like grinding the timing cover bolt and AC mounting boss for the ATI pulley. Just go easy, take your time and take a little at a time off with frequent test fits. You can always take a way, but you can't add more back (without a TIG welder anyway).


I'm no expert on these Gen3 Hemis by any means so take this all with a grain of salt but hoping these tips could help someone else doing the same or similar mods.

View attachment 75623
This is so bad ass!
I want to see the car!


1971demon

Poster Club Hall of Fame
Founding Member
Member ID
#1122
Messages
21,605
Reactions
46,970
Likes
352
City
Orchard Park
State
NY
Country
United States
Vehicle
2018 Demon 2016 Hellcat
#6
We need pictures since most of us can't read.
You will have to excuse our southern boys lack of reading comprehension...(not many schools go past 5th grade)...being from NY...I'm sure you get it...Welcome to the club..and remember...talk s l o w l y to those south of the Mason Dixon line...;);)


DavidKFla

Poster Club Hall of Fame
Premium Account
U.S. Air Force Veteran
10 Second Best E/T
HFCOTM
Member ID
#6741
Messages
30,871
Reactions
135,742
Likes
402
City
East Coast
State
FL
Country
United States
Vehicle
2018 Charger Hellcat
#7
You will have to excuse our southern boys lack of reading comprehension...(not many schools go past 5th grade)...being from NY...I'm sure you get it...Welcome to the club..and remember...talk s l o w l y to those south of the Mason Dixon line...;);)
I grew up in Jersey...🤣🤣🤣


1971demon

Poster Club Hall of Fame
Founding Member
Member ID
#1122
Messages
21,605
Reactions
46,970
Likes
352
City
Orchard Park
State
NY
Country
United States
Vehicle
2018 Demon 2016 Hellcat
#8

DavidKFla

Poster Club Hall of Fame
Premium Account
U.S. Air Force Veteran
10 Second Best E/T
HFCOTM
Member ID
#6741
Messages
30,871
Reactions
135,742
Likes
402
City
East Coast
State
FL
Country
United States
Vehicle
2018 Charger Hellcat
#9
You southern boys all say that...;);)
It's hard to admit that I'm from jersey.


1971demon

Poster Club Hall of Fame
Founding Member
Member ID
#1122
Messages
21,605
Reactions
46,970
Likes
352
City
Orchard Park
State
NY
Country
United States
Vehicle
2018 Demon 2016 Hellcat
#10

DavidKFla

Poster Club Hall of Fame
Premium Account
U.S. Air Force Veteran
10 Second Best E/T
HFCOTM
Member ID
#6741
Messages
30,871
Reactions
135,742
Likes
402
City
East Coast
State
FL
Country
United States
Vehicle
2018 Charger Hellcat
#11

Mean Cat

4000 Posts Club
Founding Member
Donating Member
9 Second Best E/T
HFCOTM
Member ID
#997
Messages
4,981
Reactions
9,438
Likes
302
City
Houston
State
TX
Country
United States
Vehicle
2017 Challenger Hellcat
#12
Not sure if this is allowed here, but I'm dropping a 15k mile 2018 6.2 Hellcat and 8hp90 into my 70 challenger and figured it might be cool to share. Obviously a lot of the swap stuff doesn't really concern most here who have actual hellcats, but figured I'd share some of the things that might be helpful (motor specific stuff).

I just finished up swapping an MMX NSR HC1+ cam and doing an ATI lower pulley. Going to share a few tips because I found there was A LOT of bad info out there with these mopars. I come from the LSX world and it's much easier to find accurate information, but these cars seem to have a host of people making youtube videos who act like they know what they're doing but push some false info.


I'll start with the cam swap.

1) you have to lift the blower up by removing all the long blower bolts and propping the front of the blower up with something like a wood block so you can access the coolant passage tube bolt that mates the coolant pipe with the timing cover. I tried for a while to get to it without lifting the blower and it was impossible. Don't waste your time, takes 2 minutes to remove the long blower bolts and lift the front of the blower up giving you clear access.

2) Comp's instructions for the cam phaser limiter lockout incorrectly state you need a Torx T25 bit for the cam phaser bolts. Perhaps certain years used T25, but I have seen a few cam phasers now and all of them require a TORX PLUS E25 bit. YOU WILL STRIP THE BOLTS OUT DURING YOUR FINAL TORQUE IF YOU USE A T25 AND NOT A TORX PLUS BIT. I can't reiterate this enough. IF you strip out the bolt that holds the clock spring (the "do not remove" bolt in the instructions) you are pretty much screwed unless you figure out a way to extract that bolt without unwinding the clock spring (good luck). *** all OEM phasers I have seen use the E25 (Torx Plus) but I have seen one Melling brand phaser that used E27 (also Torx Plus).

3) If you were like me and checked cam endplay with the thrust plate bolted on, don't freak out. The cam will move way too much, it's supposed to. The cam phaser/timing sprocket will pull the cam forward when bolted on and sandwich the cam between the thrust plate and THAT's when you will check cam end play, after the phaser is installed.

4) Kind of simple but an oil filter wrench (the two handle plier type) works great to safely compress the timing chain tensioner without risking damage to the chain or tensioner. The notches in the jaws fit perfectly over the chain.

5) TIMING MARKS. This is a huge one as I saw one video on youtube claiming to be able to time the motor by the oil pump splines and from what I could tell, that made zero sense and would not work (thanks to a buddy of mine who builds Mopars for a living for confirming that as I thought I was going crazy watching the video).

Best way to time the motor is to set cylinder 1 at TDC (I like to use a bore scope down that spark plug hole). This means when cyl 1 is furthest up in the bore on the COMPRESSION stroke (you should be able to feel pressure building if you stick your finger in the spark plug hole while the piston is climbing to the top and both pushrods should spin freely once the piston is at TDC indicating both valves are closed).

From there, find the timing indicator in the cam phaser/gear (it's a little rectangle on the cam gear/sprocket itself, kind of have to look behind the phaser) which should be at 12 o clock. Now you have confirmed you're at TDC. From there, I made a few parks with a paint marker.

Top of phaser at 12 o clock, gear tooth on phaser at 12 o clock, a link on either side of the gear tooth, a link on the timing chain and crank gear tooth at 6 o clock, a link and a line on both the tensioner and guide so I can match those up as well for peace of mind.

Remove the cam phaser and the cam pin should be at 12 o clock. Install the new cam and line it all up the same way with your marks.

6) Rocker Shaft Assembly. I found these are NOT torque to yield bolts, they CAN be re-used despite even a dealership tech telling me otherwise. They have a torque angle measurement in the sequence but this is to account for lifter bleed down and nothing to do with bolt stretch.


ATI Balancer install:

Can't really help much with the correct tool, I just put two balancer remover/installer tools together and was able to make a hybrid to remove the factory balancer.

for install, you're probably better off using a long stud (M16x1.5 I believe, most tools don't have it) to install, but if you have some experience with this you can do what I did and just hammer on the hub with a wood block until you are in deep enough to use the old bolt to walk it in. I like to use anti seize behind the washer for added lubrication. Just be very careful using this method because if you hammer it on crooked you could end up damaging the balancer or crank. I have usually found this is pretty difficult to mess up though since of the tight fit. You need to make sure you can hammer it on enough to get more than a few threads to engage on the bolt, and if it feels like it's taking a ton of tension to tighten, stop and go find a stud before you strip threads out.

You are really supposed to mic and hone these things, but i've never had one yet on a factory crank that couldn't be pulled on fairly easily providing you use a coating of anti seize on the crank and in the hub bore. Don't try to install one dry, you are asking for trouble. I didn't need to boil it or heat it in an oven or anything. There were a few gentle pops going on which indicates it probably could have used a thou or two honed out of it but nothing that made me worried it would damage anything going on or give me an issue in the future coming off, and i'd rather have it on the tighter side for obvious reasons.

Everything else is just following instructions, like grinding the timing cover bolt and AC mounting boss for the ATI pulley. Just go easy, take your time and take a little at a time off with frequent test fits. You can always take a way, but you can't add more back (without a TIG welder anyway).


I'm no expert on these Gen3 Hemis by any means so take this all with a grain of salt but hoping these tips could help someone else doing the same or similar mods.

View attachment 75623
Welcome to the Forum!

Nice write up & awesome sleeper swap. Can't wait to see it running & pics.

On the ATI balancer hub, I have found it easy to heat up the hub in the oven for a little bit, will need leather gloves, some anti-seize on the crank & it will tap on easy, then use bolt or install tool till seated. Work fast while hub is still hot & it goes on pretty easy.


Last edited:
OP
1

1mean376

Law Enforcement
Member ID
#13680
Messages
8
Reactions
44
Likes
12
City
Holtsville
State
NY
Country
United States
Vehicle
1970 Challenger RT
Thread Starter #13
Thanks everyone! Happy to have received such a warm reception haha . I will definitely keep you guys updated on the build and i'm sure i'll have some questions as time goes on regarding more performance mods.

For now, I'm hoping I could get the car into the 9's with just the ATI lower (and the cam, but I doubt that adds much more than 15-20rwhp if that). Might be a tall order but i THINK the race weight of the car will be around 3600lbs if my best guesses are accurate. What do you guys think? I have seen lower only HC's run in the mid 10's but i'm not sure if that's the norm or not. If that's true, I figure subtract almost 1000lbs and 9's should be possible.

Mean Cat, the heat usually does the trick, I try not to use it unless I have to because I like to gauge how tight it actually is without the heat (just so I don't run into an issue with it never coming off again lol). I know the right way is to hone the hub, but i'm always worried about that as without having machinist quality measuring tools it would be very easy to hone it too much and leave it fitting too loose, ruining the hub. Plus I'd rather have a vey tight fit especially on a setup like this where I only put a shear pin in and not a full length woodruff key.


Just one more tip I forgot. I read a thread about a HC lower pulley swap where a bunch of guys had issues with breaking the OEM crank bolt loose. Just heat the OEM bolt up with a torch and even the cheesiest of impact guns should have no problem with breaking it loose. Just be careful to focus the heat on the bolt and not the crank snout and you don't have it heat it too long, just a few seconds usually does the trick for me and allows me to gun it off with no issues.


Speedy!

Infomercial Producer
Staff Team
Founding Member
U.S. Marine Veteran
9 Second Best E/T
HFCOTM & HFCOTY
Member ID
#1070
Messages
6,581
Reactions
16,874
Likes
402
City
Interwebs
State
TN
Country
United States
Vehicle
Demon 170
#14
Cool project and good info. Not sure what your plans are for the upper pulley, but in the picture I "think" I see grease coming from the grease cap (center of the pulley cap). Be sure to double check that, these pulleys decouple which you probably know and things can get interesting if that stops working.

It's been a minute since I pinned my crank, but I don't remember an impact fitting in the space. Engine out of the car is no problemo obviously.


OP
1

1mean376

Law Enforcement
Member ID
#13680
Messages
8
Reactions
44
Likes
12
City
Holtsville
State
NY
Country
United States
Vehicle
1970 Challenger RT
Thread Starter #15
Cool project and good info. Not sure what your plans are for the upper pulley, but in the picture I "think" I see grease coming from the grease cap (center of the pulley cap). Be sure to double check that, these pulleys decouple which you probably know and things can get interesting if that stops working.

It's been a minute since I pinned my crank, but I don't remember an impact fitting in the space. Engine out of the car is no problemo obviously.
didn't even think about the clearance for an impact gun in there. It should make breaking it loose with a breaker bar much easier as well, if you can even fit the torch lol.

I was going to keep the stock pulley, I was hoping the 10% lower would be enough to get this light weight into the 9's. I wasn't aware with any issues with the clutched upper pulleys, that's something i'm going to have to research. Any way to check it? this engine had 15k before being pulled so I didn't expect there to be any issues with the stock parts on it :-(


Speedy!

Infomercial Producer
Staff Team
Founding Member
U.S. Marine Veteran
9 Second Best E/T
HFCOTM & HFCOTY
Member ID
#1070
Messages
6,581
Reactions
16,874
Likes
402
City
Interwebs
State
TN
Country
United States
Vehicle
Demon 170
#16
In the picture I see a little grease weeping from the pulley grease/dust cap. That's not normal, so I'd at a minimum clean that up and do an inspection.

These pulleys will unlock as it were when you transition from on/off throttle to keep reverse pressure off the supercharger. You can try spinning the blower pulley clockwise by hand, then hold the pulley. It should stop but the rotors keep slowing down. There aren't a ton of issues with the pulleys, but we do see them occasionally fail. Probably less than 1%. Never use an impact on installation, that's where a lot of the problems come from.

I think a 10% lower and stock upper will be a nice combo for your setup.


Magnified

Poster Club Hall of Fame
Founding Member
Member ID
#1155
Messages
11,812
Reactions
20,023
Likes
352
City
West Texas
State
TX
Country
United States
Vehicle
2017 Charger HC (once upon a time)
#17
In the picture I see a little grease weeping from the pulley grease/dust cap. That's not normal, so I'd at a minimum clean that up and do an inspection.

These pulleys will unlock as it were when you transition from on/off throttle to keep reverse pressure off the supercharger. You can try spinning the blower pulley clockwise by hand, then hold the pulley. It should stop but the rotors keep slowing down. There aren't a ton of issues with the pulleys, but we do see them occasionally fail. Probably less than 1%. Never use an impact on installation, that's where a lot of the problems come from.

I think a 10% lower and stock upper will be a nice combo for your setup.
beat me to it


Mean Cat

4000 Posts Club
Founding Member
Donating Member
9 Second Best E/T
HFCOTM
Member ID
#997
Messages
4,981
Reactions
9,438
Likes
302
City
Houston
State
TX
Country
United States
Vehicle
2017 Challenger Hellcat
#18
I agree, with the SC pulley seal leaking, it's a matter of time that it will fail.
And if that grease blows back (looks like it has) on to the pulley grooves & belt then good chance there will be belt slippage.


Last edited:

Magnified

Poster Club Hall of Fame
Founding Member
Member ID
#1155
Messages
11,812
Reactions
20,023
Likes
352
City
West Texas
State
TX
Country
United States
Vehicle
2017 Charger HC (once upon a time)
#19
OP
1

1mean376

Law Enforcement
Member ID
#13680
Messages
8
Reactions
44
Likes
12
City
Holtsville
State
NY
Country
United States
Vehicle
1970 Challenger RT
Thread Starter #20
For the blower pulley, I took a close look at it and it was perfectly clean. No grease. Only issue is I did a pretty thorough cleanup of the motor so I'm not sure if maybe that was something I wiped down or not lol.

Could have just been the camera angle or maybe I smudged grease on it while working on it. Guess i'll have to keep an eye on it after I get it running. What are the odds the clutch would be bad at 15k miles on a stock engine? Seems like that wouldn't be common but I know QC on most parts these days isn't what it used to be..


unfortunately I had to rush getting the engine/trans in the car (which is something pretty critical and I normally don't have to rush) but the trans took a dump in my 700WHP LSx/LSA 96 Impala and I had to get it out while still on warranty, but the car is in storage and with the challenger and engine in the garage I had nowhere to pull the trans and keep the car at unless I put the challenger together and got it all in my tent.

Long two nights but think I got it 'close enough'. Had to cut up the Holley swap crossmember and add 3/4" to it, had to open up the torsion bar tunnel and plate it back just a little and then a few key hammer blows after heating up the floor pan with a torch.

Welded up mounts and she's in. Test fit the 2" headers and they appear to fit.

Still have to make a few shims so I could raise the tailshaft up a little higher. Have about another inch and a half I can go up from where it's sitting in the pics. Really isn't changing the engine angle much when i raise it, but i'm going to anyway just to get it tucked as tight as I can into the tunnel. Shouldn't have any ground clearance issues then.

Motor is sitting at a 4 degree angle back which is a little more than I wanted but without building a new tunnel, it will work. It's in the range most would consider acceptable for engine placement so I'm not too worried.


Top